
We have all visited our favorite website and found out that it is in maintenance mode. Just like any human being, technology also needs to be maintained and improved from time to time. Many sites also utilize the maintenance page, more commonly known as Coming soon page before they launch their website.
So, how do you they do it? If you are using WordPress, you have already solved half of the problem of putting the site into maintenance mode. It is that easy!
The guide will only aim WordPress users for now. If you use other platforms, it is wise to search the internet.
How To Put WordPress Website Into Maintenance Mode
WordPress maintenance mode can be done in two different ways. You can use the .htaccess file to enable quickly the maintenance page. Another method is to use a plugin to automate the whole process.
If you are wondering which one is the best way to enable the maintenance mode, then the plugin path is always a better option. But, not everyone like the plugin usage. In that case, they can use other method mentioned below.
So, without any delay, let’s get started with the guide for putting the WordPress website into maintenance mode.
Using WP Maintenance Mode Plugin
If you don’t want to play with code, WP Maintenance Mode plugin is the way to go. To get started, you need first to download the plugin and activate it. Once activated, all you need to do is configure it to make it work.
For configuring the plugin, you need to go to Settings > WP Maintenance Mode.
The plugin offers three tabs for configuration purposes. The three tabs are as follows.
- General: General tab contains all the general settings of the plugin.
- Design: Design tab is the section where you can handle the design and the message shown on the maintenance page.
- Modules: Modules take care of different functionality available in the plugin such as Countdown, Subscribe, Social Networks, Contact and Google Analytics.
Let’s go through each of the specific tabs for better understanding and configuration of the plugin.
General Tab
As mentioned earlier, it contains all the general settings for making the maintenance mode a possibility.
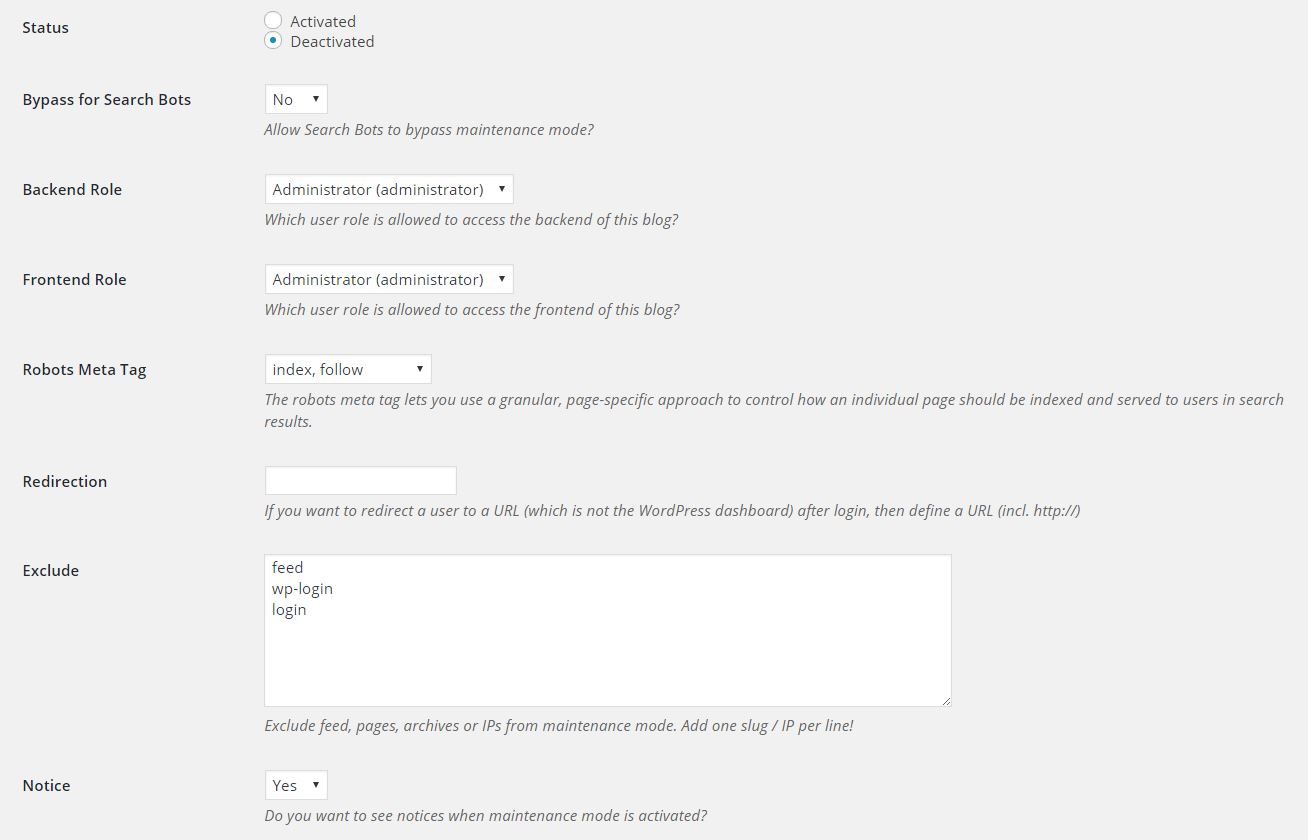
The first setting that you will encounter is the status. It will be set to “deactivated” by default. To enable it, you need to let the status to “activated”. Before you jump onto activating the plugin, it is a wise decision to go through the other settings.
In the general section, you can enable only the administrator to have access to the website. You can also modify the access mode to the frontend of the site. Furthermore, you can enable Google bots to bypass the maintenance mode and crawl the website. You can also exclude pages from being affected by the maintenance mode. Make sure that your login page is excluded; otherwise, you will have unwarranted problems.
Two minor options are the notice and dashboard link. Both provide accessibility to the plugin usage.
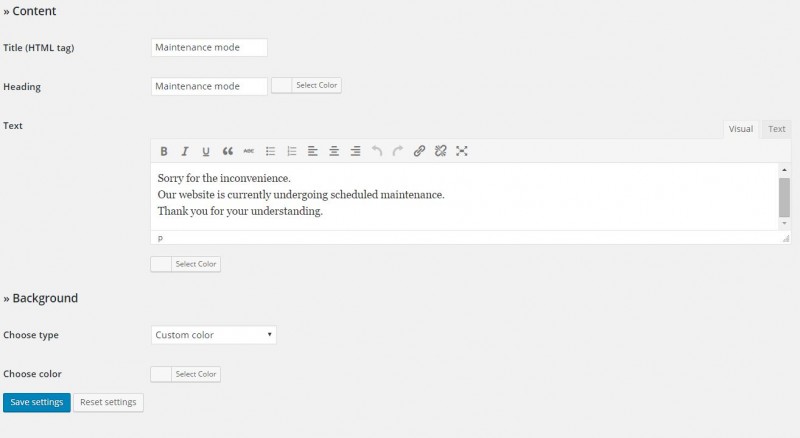
Design Tab
The design tab contains all the options that you will need to create the maintenance page. You can change the title, heading, text and also set a custom background color to match the website persona.
Module Tab
The module tab contains all the discrete functionality that the plugin offer. Using the tab settings, you can set a countdown timer, provide a clean looking subscribe button with stats, enable social network sharing option, and also add contact option. You can also add Google Analytics to the page for easy tracking.
Using the plugin is self-explanatory. All you need to do is configure the plugin according to your requirements and then save changes to let the effects take place.
Using .htaccess
The power of .htaccess can never be denied. It can be used to change a multitude of settings. One of the use is to enable maintenance mode. The math is simple — you need to use the 503 status code to let the user know that the website is in maintenance mode and is not available for now.
To make it work, you need to create a .html file or a .php file with the message that you want to show to the visitors. It can be a simple line showing the message or a witty line that your users would love to read from you. The choice of the message depends on you.
After creating the file, you need to style your page. Add specific CSS if needed.
The final step is to insert the following code to the .htaccess file and let it handle everything from there.
<IfModule mod_rewrite.c>RewriteEngine onRewriteCond %{REMOTE_ADDR} !^123\.456\.789\.000RewriteCond %{REQUEST_URI} !/maintenance.html$ [NC]RewriteCond %{REQUEST_URI} !\.(jpe?g?|png|gif) [NC]RewriteRule .* /maintenance.html [R=503,L]</IfModule>
Once done, you can save the file and let the magic happen. Also, make sure that you change the RewriteCond statement with the address you want the website to redirect too.
Over To You
Maintenance pages are the part of any website. It doesn’t matter if the site uses WordPress or any other CMS. For WordPress users, it is best to use WP Maintenance Mode plugin.There are other plugins out there that you can try. Also, there are coming soon templates or plugins that make the whole deal look different.
Whatever you choose, putting up a maintenance page is a good practice. This way, your visitor feels necessary and understand what the site is going through. It is important for your business to keep every single visitor intact and not lose them to some fancy error that they just don’t like.
Also, the matter of fact, seeing creepy error codes are stressful and can easily scare away a visitor.
If you found the article useful, don’t forget to comment and share.
WP Maintenance Mode is a great plugin but has had some security vulnerabilities in the past. If you are using version 2.0.6 or earlier make sure to update to the latest version. I’d love you try my plugin some time as well. Coming Soon and Maintenance Mode by SeedProd and if you ever want a free copy of the pro version for review let me know. Cheers