

WordPress is an amazing content management system. To properly utilize it, you need to customize it according to your requirement. That’s why we are going to go through a tutorial on how to add an image in the WordPress sidebar widget.
By default, WordPress has a clean way to let you upload and manage images. But, it doesn’t let you add an image to the WordPress sidebar widget. Don’t worry as we got you covered here. In this article, we will be discussing different methods by which you can add an image. Let’s get started.
How to add an image in a WordPress sidebar widget
Method 1: Adding through image widget
One of the easiest methods of adding the image to the WordPress sidebar is using the image widget. It comes with WordPress by default and hence is the best way to add images.
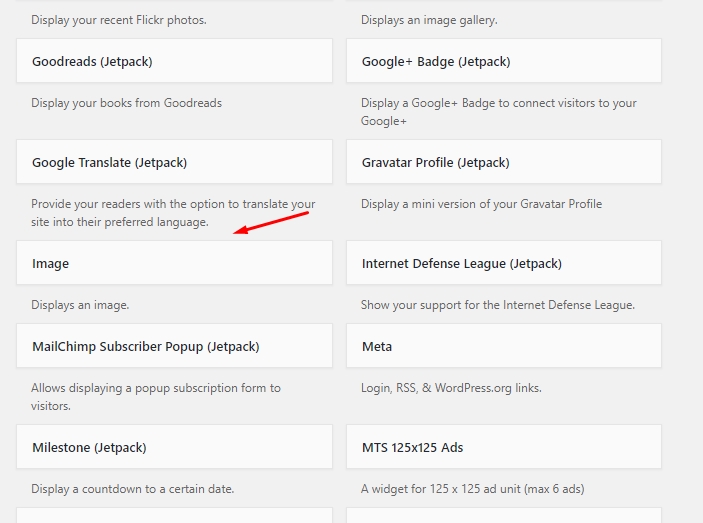
To add the image through image widget, you first need to go to Appearance > Widgets. Once you are on the Widgets page, you will be able to see a lot of available widgets. From there, you need to choose “Image Widget” as shown in the image below.
Now, you need to click on the Image widget and drag it into the sidebar which is one the same page.
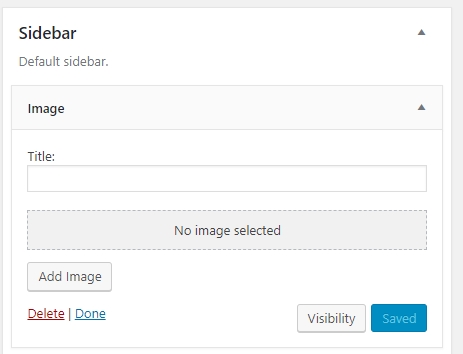
When you click on the widget, you will be able to find more options as shown in the image above. Here, you can add the title of the image(optional) and browse to add an image. The image can be any image you want. After you have selected the image of your choice, click on the save button to save your choice. You can also add the image using the “Add Image” button.
Make sure that you fill up important fields including title, caption, and so on. This will help you in SEO and ensure that you add the right description.
That’s it. Once you click on “save”, to make sure that the image is now saved.
Method 2: Adding through the text widget
Adding image using the image widget is the easiest way. However, if you want to add custom HTML or text formatting along with the image, then you need to use the text widget. Text widgets are similar to the image widget.
To add them, you need to go to Appearance > Widgets. There you will find the “Text” widget. It will look like below.
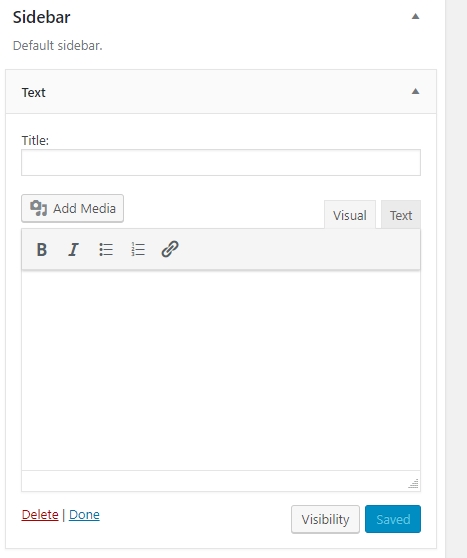
Here you can add text, add media and so on. As you might have guessed, clicking on “Add Media” will allow you to upload an image. Once you click it, you can choose the image and click on “insert to post” button. That’s it, you have successfully added an image to the sidebar widget using the text widget. Another advantage of using this method is that you can add text or other elements using the text widget. The text editor also gives you basic formatting options so that you can format with ease. Once done, click on Save button and your image with the necessary text will show on your website.
Method 3: Manually adding image widget into the sidebar
If you are looking to add advanced HTML code to your image, then you need to manually add it to the sidebar. The text widget supports HTML, but at a very basic level. This is why you need to use this method if you want to add advanced HTML code.
To do so, you first need to upload the image to your website. To do so, you just need to go to Media >> Add New. From there upload the image of your choice.
After uploading, you will see a small “Edit” option next to the image.
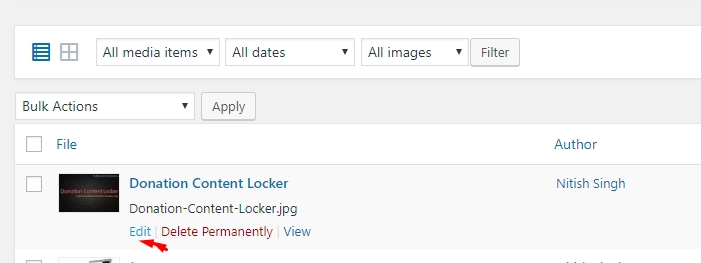
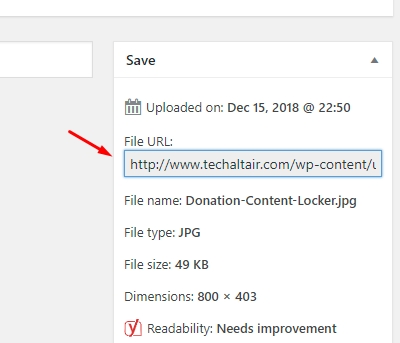
Click on it, and you will be transferred to a new page where you can edit media according to your choice. From there, click on the File URL and copy it. To make sure that you don’t lose it, just copy it to a notepad and keep it safe.
Next step is to go to Appearance > Widgets. Now choose the “Custom HTML” widget. Now, you are ready to insert the image by using the source code mentioned below.
<img src=”Image URL here” alt=”alt text for your image here” />
The img tag is for inserting the image in HTML. It has two attributes, src, and alt. The source attributes are where you put the source of the image. The alt attribute is used to tell search engines more about your image.
Method 4: Adding through the use of a plugin
The fourth method is to simply use a plugin. WordPress ecosystem is extremely impressive and makes sure that there are plenty of plugins that you can use to do simple tasks as adding the image to the sidebar. We recommend using Image Widget. It is free to use plugin, that lets you add images to the sidebar without going to deep into steps or adding code. All you need to do is add the plugin.
Once done, you will have to go to Image Widget where you can choose to add “Image Widget” widget. This will enable you to add an image with alternative text, caption, and related tag as well. You can also choose to add size, align and link to the image. After you have added all the fields, all you need to do is click on “Save” for it to appear on the sidebar.
Conclusion
This leads us to the end of adding an image to the WordPress sidebar widget. We discussed 4 methods and we hope that you found at least one method useful for yourself. If you did, then don’t forget to comment below and let us know what do you think about the tutorial. We are listening.
Leave a Reply